Copy Write © 2/18/2004 Updated 12/16/2005 Anytime something does not go as planned, usually there are several factors involved in the situation.
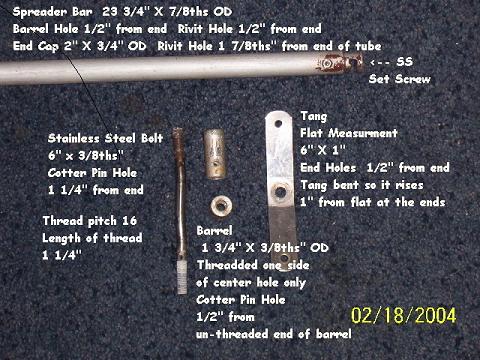
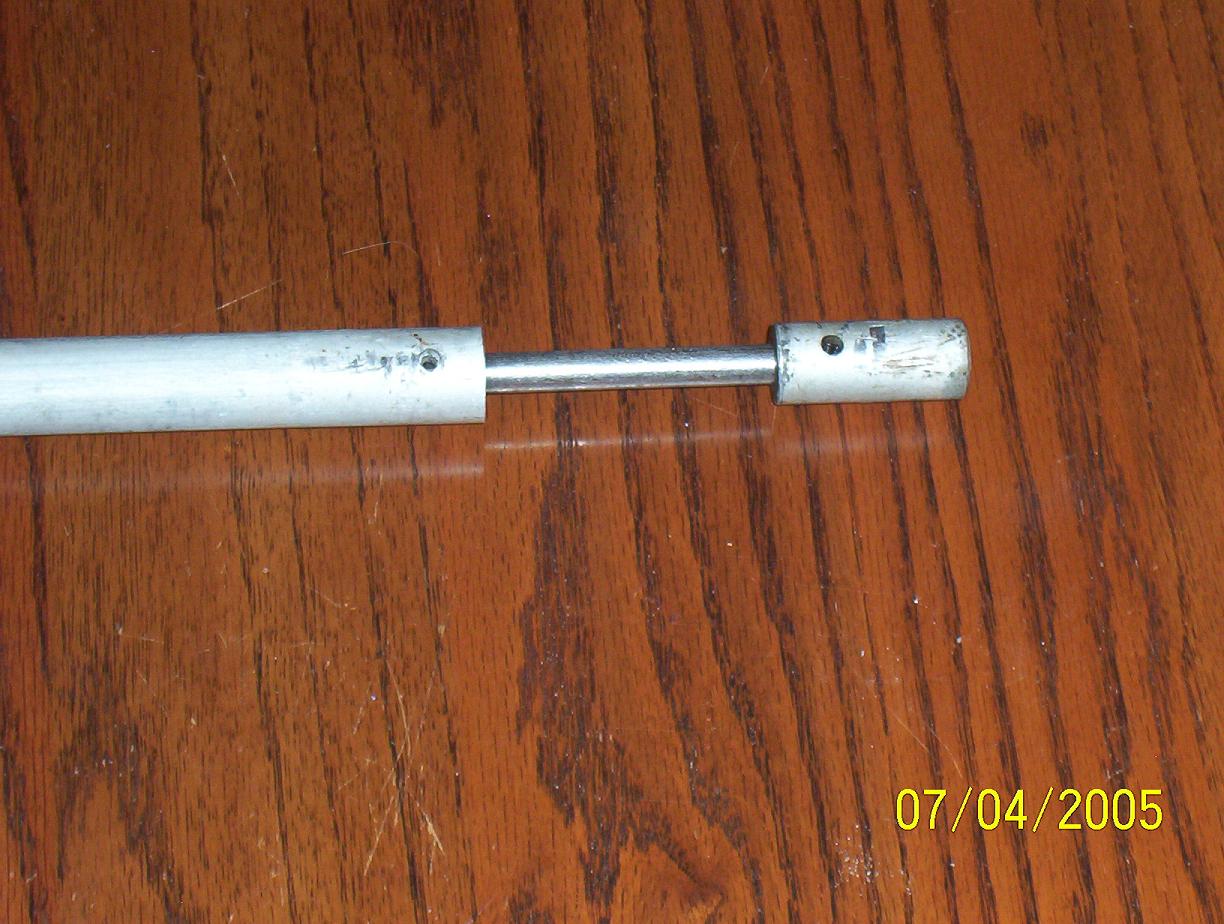
One of the really adventuresome aspects of owning an old boat built by a company no longer in business is replacement parts. Initially when the damage was discovered I did not have the resources to do this job. The missing tools needed were a drill press with vises, a bench mounted vise and a die of the proper thread size. Years ago the keel was pulled and refinished During that process I learned most machine shops have a minimum charge of $50 or so. The budget for the new spreader shaft was established. If it cost close to $50 to build a new one then it would be simpler to hire a machine shop to fabricate the new shaft. The purchase of tools & equipment to do this job myself would be the deciding factor. All I had to do this job was a hand drill, no vises or way to secure the stainless steel shaft for drilling or cutting the new threads. Time passed including a career & job change. My new situation allowed access to a real nice drill press with clamps a die & tap kit and a stout pedestal mounted vise. After a quick trip to the hardware store for a six inch stainless steel bolt ($1.50).along with four Carbide Stainless Steel drill bits ($4.50 each). Meeting with the guy who was going to help me with this project several factors I never considered developed. 1. I never thought to measure the diameter of the mast. I figured if the stud is six inches long and I measure the cotter pin holes from each end that should be enough. 2. The natural thought would be to buy a six inch bolt. Cut the head off, measure & drill the cotter pin holes then use a die to thread the end of the shaft where the head used to be. If a hack saw is used to cut off the bolt head around 1/16th" is lost to the final length of the stud. The big question how critical are the measurements. You don't want to go thru all this only to find the stud is too short. Inspecting the original stud, wear marks were found along the shaft indicating the walls of the mast as the stud passed thru the mast. This provided the needed mast dimensions. Once we got the dimensions a centerline could be established and measurements could be more precise. We discussed grinding off the sides of the bolt head. There was concern about how smooth the finished product would be for the die to fit properly. I had one of my "world famous bright ideas" Instead of cutting the bolt head off. Use a grinder to carefully grind down one side of the bolt head flush with the shaft. Clamp the shaft in a vise and use a hack saw to cut the head off along the ground down section. The trick would be to avoid over heating the shaft end and ruining the metal. By doing this the width of the cut would not affect the finished length of the shaft.
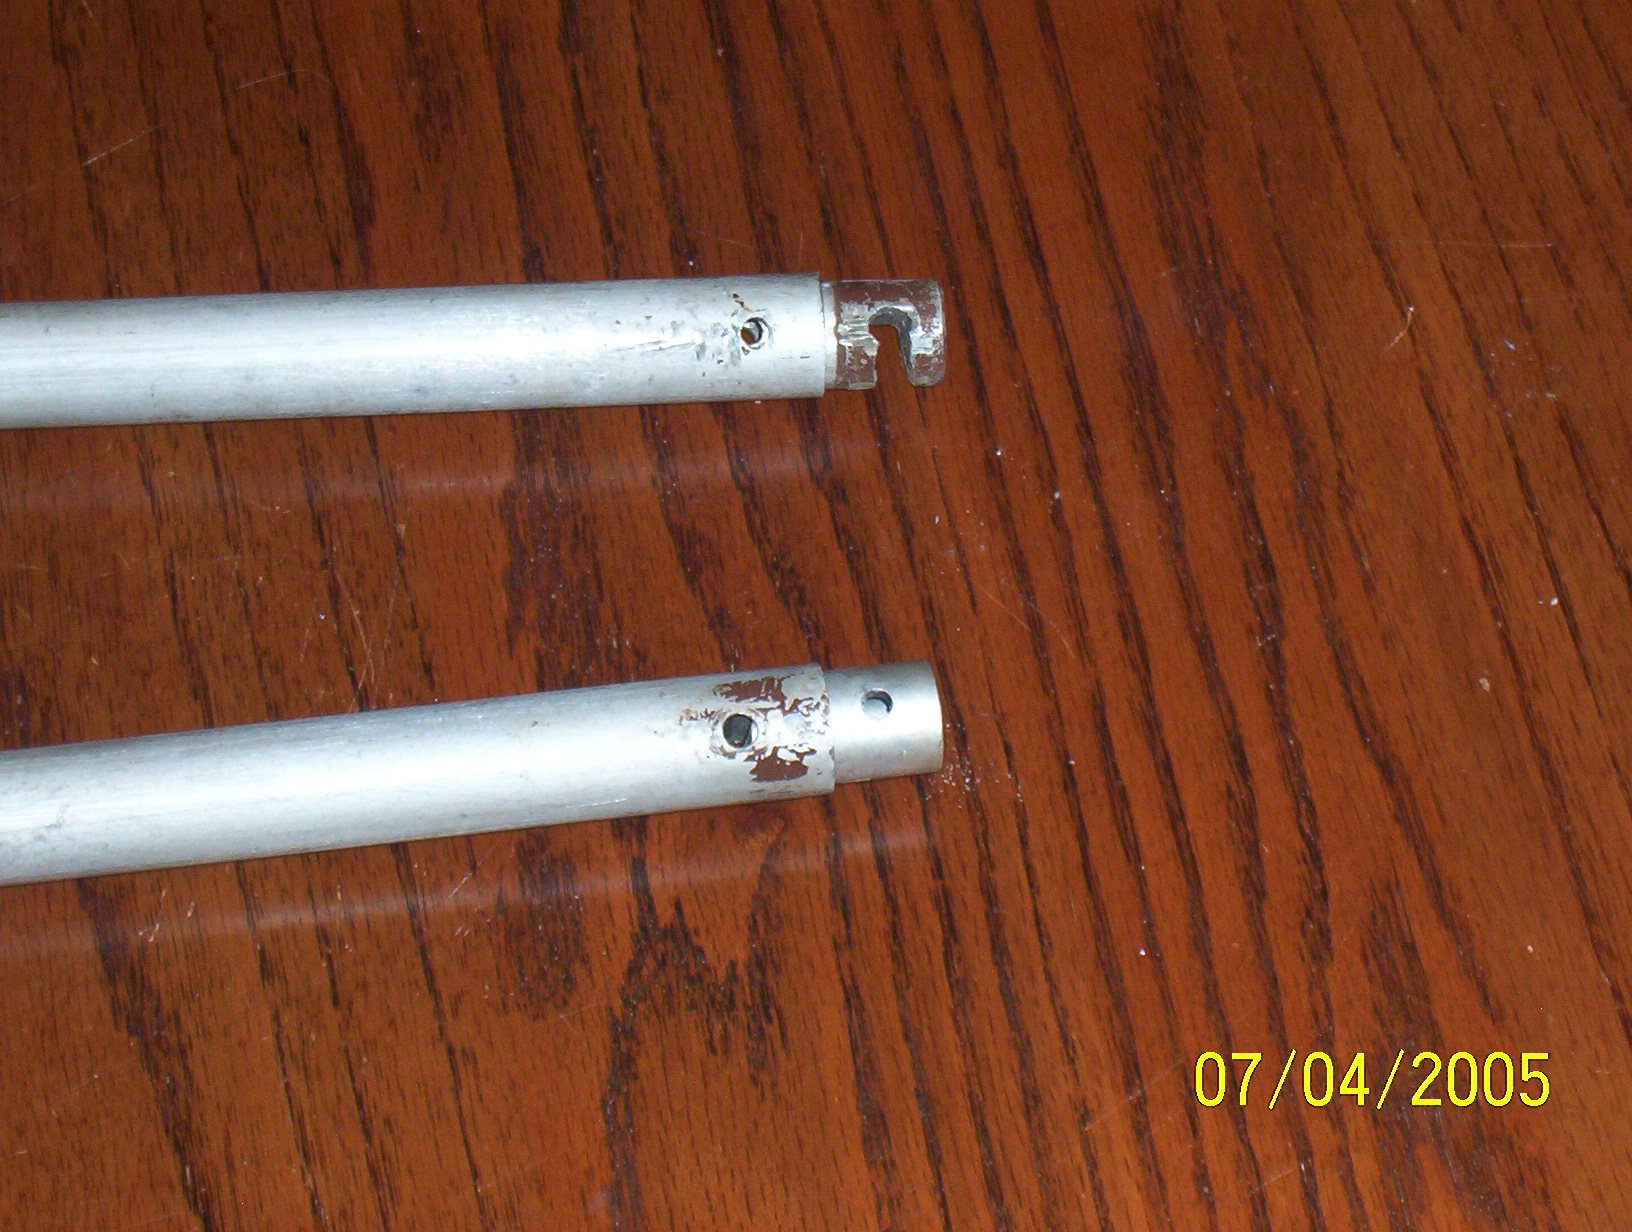
Carefully one side of the bolt head was ground down to the shaft. A bench grinder was used to smooth the end. The cotter pin holes thru the shaft were laid out and marked. Setting the shaft up for drilling and the drilling process went smooth. I had four new bits only needed one. Just go slow and use plenty of oil. The clamps on the drill press were a big help in positioning the shaft. Grabbing an adjustable wrench and die along with oil we positioned the shaft vertical in the pedestal vise and proceeded to screw the die down the shaft carefully and slowly. Just the process of working the die slowly down the shaft heated up the end enough that you wouldn't want to touch it. I am happy to report the new spreader shaft fit nicely thru the hole in the mast. There was about 3/8ths" play along each side of the shaft after the barrels were threaded on the ends. All said and done the project went well Return Spreader TipsThe design of the original spreader tips included a small set screw. 20 + year old boat, salt water, aluminum spreader tip and stainless steel set screw. All combined together and fused the set screws in place. One set screw loosened due to the heat produced by grinding the screw out of the slot. Unfortunately the other set screw was not cooperative. Salvaging these parts was no longer an option, the next step would be to design something else. Much time was spent exploring options on fabricating new spreaders. Each option presented less than ideal solutions in both results and expense. Before starting the fabrication of new spreader bars I decided to drill out the rivet holding the spreader tip in place. Knock out the tip to see if it would be possible to reverse it. It looks like all I need to do is slot the other end of the tip, use a bolt or rivet to hold it in place thru the end that was previously sticking out.
Job completed. |
Return DisclaimerThe information on this page is not intended as a "definitive" guide to sailing . formated for 800 x 600 and Cascading Style Sheets Return |