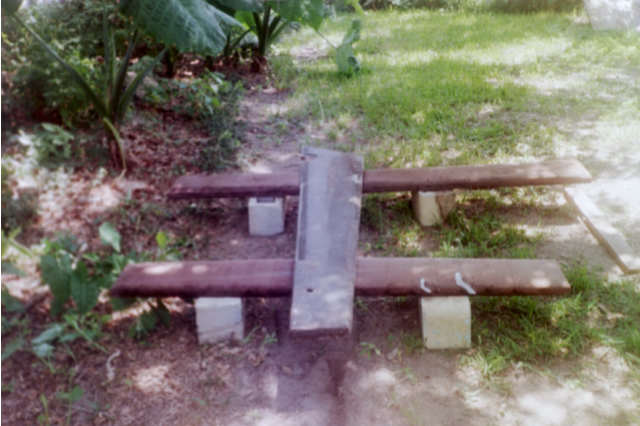
Copy Write © 10/14/2000 Updated 12/6/2005 My initial inspection shows the fiberglass tape and resin worn off the lower foot leading edge. This part always hangs down and is exposed. If I drag the keel through the bottom, it is exposed, some wear is expected. Other than a few barnacles everything else looks great. Using the same method of Keel removal as I used during the 1998 / 1999 keel refinishing process the keel is once again sitting on the trailer. The keel is now resting upon the wood I placed along the trailer cross members. This time I don't plan much work on the keel, I intend to drag it to our side yard under a big live oak tree (much cooler under there to work). Using PVC pipes for rollers I work them under the keel and roll the keel off the back of the trailer onto another length of wood. As the keel is rolling it gets away from me. Working as a welder in East Texas many long moons ago, I learned never to argue with big steel. My philosophy is to get out of the way and figure what to do once it stops moving. The rollers never roll straight there is always one that goes the wrong way. The keel ends up in the dirt, which is fine, as it needed to get there anyway. I have a single speed boat winch loaded with cloths line wire. This winch is very handy to move heavy things. Throwing an anchor line over a big tree limb shackling the winch to the line. Playing out the wire I weave the end through the length of chain bolted through the keel pinhole. Once the wire is secure to the keel the winch is cranked. As tension builds the keel moves bit by bit to a point. I realize the head of the keel is trying to bury in the dirt. Plan "B" springs to mind. Swap ends, due to the beveling of the Keel foot, moving goes much smoother. Once under the limb the winch is cranked until one end is well off the ground. Placing two concrete cinder blocks apart a 2"X 6"X8' is placed across the blocks and lower the end down to the wood. Hooking up the other end of the keel and placing similar blocks and wood soon it too, is riding well off the ground.
The keel must be wet sanded. I coated the keel more than necessary the last time with fiberglass resin. Doing Karate Kid training I "wax on" "wax off" the keel till it looks clean. Flip and go at it again. For those keeping their keel fully retracted in a slip. There is an added bonus of limited barnacles only on the leading edge. They are small and clean up quickly. Although a good dose of elbow grease is needed. There are three hot spots on the keel a worn spot on the leading edge of the keel foot where the keel pendant connects and the keel pinhole. Water rusts the steel and gets under the resin. They will need special attention later. It is time to dive in with the grinder. First the bad areas are ground back to good steel. Then feathering the edges of the existing resin. Actually the rusty spots aren't that bad. During the 1998 / 1999 project polyester resin was poured all over the keel and laid two layers of tape on the leading edge. Water worked its way into the keel pin and the pendant hole under the resin and rusted. This time I will use some cloth roving to stabilize the areas. Cut some cloth lay it in place and wet out. Wait for the kickoff and do it again. Looking at the pendant hole I realize the wire threaded through, overtime wore thru the resin causing a problem. Getting creative three layers of roving are laid. Then several SS washers of decreasing size down to 3/8ths are glassed in. Final layers of cloth are laid and resin to finish one side. When I get the time the keel will be flipped and the other side done the same. I am of the delusion the washers will keep the cable from wearing the resin and exposing steel. Only time will tell The worn spot on the foot is not as bad as it seemed. I guess I need to consider sailing the boat in water deeper than two feet to keep the foot from dragging. Several layers of roving are applied. I soon have a mess trying to work everything around a corner I don't have the skill to make everything lie down like it should. No big deal I will let it set up and cure then sand back down into shape. The foot required a quick hand to grind smooth the rough edges. Cut through on a few spots. Before any resin is laid two pieces of tape are cut to fit and I play with the shape until it looks like it will lay right. Wetting everything the SS washers are laid on the pendant hole. My only concern is if the holes will line up straight.
The keel is flipped and the other side cleaned with a grinder (runs and drips) another layer of cloth is laid on the pendant hole and keel bolt hole.
Getting the keel from the back yard to the side yard was easy; I wasn't so sure how to get it back and lined up to roll onto the trailer. Standing around scratching my head another brainstorm (this one actually worked). Landscape timbers are eight feet long and flattened on two sides. Aligning two timbers sided by side about a foot apart. PVC rollers are cut about three feet long. Carefully working the keel off the wood and blocks and down to the timbers. The keel is now lying on PVC rollers on the flat sides of the parallel timbers making a track to roll on. Another two timbers are placed at the end of the first pair of timbers. Ever so carefully I start moving the keel. The three-foot long rollers stick out from underneath the keel and I am able to keep them rolling straight (a problem I have had in the past with shorter rollers).
As I transition from one set of timbers to another the old set is placed in front and so we go across the back yard to the boat. The keel is rolling perpendicular to the boat. Working the keel under the stern of the boat it is time to swing the keel pointing the same direction as the boat.
Placing a 4"X4" at an angle to the timbers, I am able to manually pivot one end of the keel off the timbers and on to the 4"X4". Now the keel is aligned with the boat.
The next step is to raise the keel higher of the ground and placing it back on the cinder blocks and wood planks the keel was on under the tree. This sounds harder than it really was. Swinging one end of the keel to one side I am able to use one of the timbers as a lever and get one end of the timber high enough for a concrete block to slide under. Pushing the same end of the keel back the other way the same leverage allows the other end to be blocked. The head of the keel is just about in line with the trailer cross members. The foot of the keel is resting on a 4"X4" and unfortunately it is not as long as the timbers. Same leverage technique but a bit more brute strength. With everything set up I want to change out the boards. We had an old hard side waterbed frame, I kept the wooden side rails because they are padded and makes for good padding as the keel is flipped side to side. Threading the padded board under the foot end of the keel and a bit of muscle the new board is placed and the 4"X4" removed. The head of the keel is it seems much heavier and due to the lack of beveled edges harder to work with. Looking at things I find I can stand on the keel foot and due to leverage raise the head. Once again the services of my daughter are needed. With her standing on the foot I am able to remove the timber and place the padded board in place. Now everything is ready for the bottom paint and installation. It is finally time to get the keel back under the boat and back in the keel well. Going back to the rail system I used to move the keel, carefully landscape timbers are worked under the existing wood supporting the keel off the ground. The rails need to be close together. From there the PVC rollers are worked under the keel but on top of the rails. The rails are just a bit higher than the wood planks I placed along the trailer cross members. Some old 1/4" plywood is place as a ramp between the rails and the wood planks. The rails and the wood planks support the plywood. So the plywood does not need to support the keel. Ever so carefully the keel is rolled under the trailer. The longer PVC rollers are working much better. Drilling out the pendant hole the wire is threaded and clamped. Cranking the pendant winch the keel is raised almost on edge. Climbing back down I find I have erred in judgment. When I dropped the keel earlier this summer the boat was too far back on the trailer. After moving it forward I should have removed the forward cross member keel roller. This roller is preventing the keel from moving forward into position. Rolling the keel back I have to remove one last cross member roller, brace the wood planks to keep the forward end from dropping due to the weight of the keel. The ends of the wood planks should have been resting on the forward trailer cross member. Cranking the pendant, the keel pivots on itself and is almost but not quite vertical. Once again the stern must be raised to provide the extra space for the keel to fall into place. Using a 4"x4"x6" to tap the keel a bit to get it aligned it finally gets in the groove. Using a jack the head of the keel is raised up into the keel trunk slot, and then the pendant is winched tight. From there a little bit of shifting and the keel pin slides through. As you may have guessed the above involves climbing into the cabin cranking the pendant then back out and down to the ground to check things then back into the cabin to crank some more. Installing the keel takes some time as I have forced myself to slow down and double check everything. |
Return DisclaimerThe information on this page is not intended as a "definitive" guide to sailing . formated for 800 x 600 and Cascading Style Sheets Return |