Copy Write10/14/2000 © Updated 12/16/2005 Disclaimer
Electrical Disclaimer
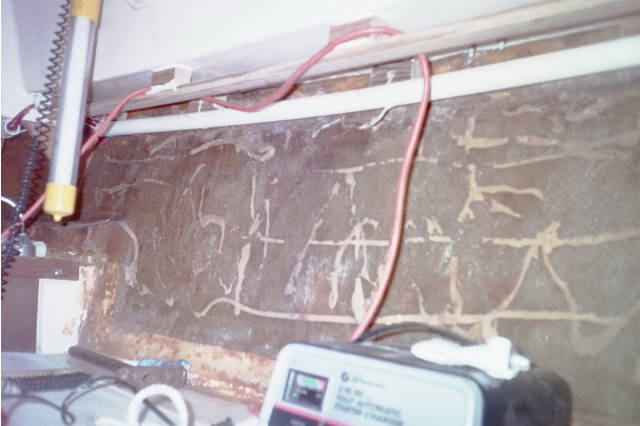
E- Mail Cabin WiringJune of 1997, I re-wired the boat using mostly new copper strand wire on all the electrical systems. At the time I put everything back pretty much where it was originally. The un-protected fuse block was under the companionway. I have grown uncomfortable with the fuse block in that location. The keel pendant is in the same general area. I have yet to find a way to keep water from slopping from the thru hull of the keel pendant. In calm situations very little water enters the boat. In heavy weather or rough seas quite a bit ends up in the cabin. I don't think salt water and a fuse buss mix very well. I want to move the fuses somewhere else. In addition more circuits are needed to allow for some additional needs. Over the years I have heard of many boat owners lamenting in anguish over an electrical system problem made more difficult because all the wires where buried and not easily accessible. The decision was made to attach a PVC pipe for wiring conduit along the hull / cabin top joint. This would allow the wiring to be accessible and protected.
A small tube of 4200 adhesive is used to glue 3"X2"X2" treated wood blocks to the cabin top along the starboard side of the cabin, almost along the edge where the cabin and hull are joined. Once the blocks are set a 1" x2" x6' treated wooden strip is glued to the wooden blocks creating a rail. The rail will protect the conduit and provide a place to hang things. After everything sets up a six foot PVC pipe is attached using cable ties to the outboard side of the rail. With the pipe installed I play "Mr. Distructo" Taking apart the cabin wiring. The folks at West Marine are always glad to see me, looking at ALL the electrical stuff. A 12 V Switch Panel with 6 circuits seems to be what I need at this time. The load rating looks good; I doubt I could build something comparable for less. There is only one snag; I don't want to cut into my bulkheads to install the panel. Some kind of mounting box is needed. Radio Shack used to be a place to buy all kinds of weird electronic parts. When I was a kid my eyes used to glaze over every time I went, just daydreaming of all the things I could build. Not that I am not an electronics technician. Radio Shack also carries all kinds of "Project Boxes". Once there I find a plastic box just about (but not quite) the right size. The bolt holes on the cover plates almost match. The cover plate of the box is scribed for a cutout for the switch cover plate and cut. Installing the box in the cabin proves a little more difficult than anticipated. Originally there was a toggle switch for anchor light and another for running lights up high on the port bulkhead. The box I was installing was much bigger. It would fit there, but would interfere with accessing some hardware mounted to the cabin top and thru bolted. The starboard bulkhead was the mounting place for a fan what's left of a compass (needs replacing) and the fire extinguisher. Finally after looking at other locations, the fire extinguisher comes off and the panel box is marked to match existing bolt holes. Once drilled and bolted running the wiring is a fairly simple job although I quickly realize I erred in my judgment. I read the directions that came with the switch box. Unfortunately I didn't comprehend all their words of wisdom. With the fuse block I didn't need a common ground the switch box is a bit different. After fumbling around and reading the instructions three more times I finally comprehend the situation. Bottom-line another trip to the PARTS store. Mean while I decide to finish wiring my new toy. Instead of a common ground I will strip extra ground wire and wrap all the grounds around themselves. Boy what a mess but for now it works. I pulled the battery from my truck and test as I go along. The next morning another trip to West Marine they actually smile at me as I enter the door, they know I am purchasing and not window shopping. I'm sure within a few additional trips they will know my first name from memory. Within a reasonable period of time a buss with enough terminals to do the job is located. Later that evening I pull apart the spaghetti mix I made of the ground and hook the wires to the bus. Luck was with me this time; the project box is just big enough to hold both the switch box and bus bar. After testing everything I screw the cover plate to the project box. With a big handful of cable ties I start getting all the remaining wires together When the switch box was installed I didn't consider accessibility to the fuses. There is a little tab that makes the fuse pop out. Previously I busted the tab on one of the fuse holders. Actually I am glad it happened while in the backyard rather than out on the water. I bought some bolts, nuts washers, and wing nuts. Taking the switch plate cover off, holes are drilled in the cover above and below the fuse holders. Threading bolts from the inside out it is tightened with a washer and nut. The bolt shaft is pointing out and a length of 1"X2" is cut and drilled to cover the fuse holders. Placing the wood over the fuse holders and the bolt shafts sliding through the holes. The wing nuts are threaded on the bolt shaft tightening the wood bar against the fuse holders. Not elegant but it will work. The fuse holders are spring loaded and if the locking tab breaks the fuse will not stay in. Wiring the switch box an allowance for one circuit for the masthead, one for running lights, and one for the cabin light, one for the cabin fan and one for a cigarette lighter adapter. With one switch open I decide to add another cigarette adapter. Running the wire thru the conduit is easy and tying into the existing switch box a snap. The adapter is located forward in the cabin on the starboard side. This way I have access to power without snaking wires all over the cabin. Return Stern LightThe above wiring project didn't include the stern light. I ran the conduit and connected a new wire to the switch box. The light end was left alone. When I bought the boat the stern light was the only light I didn't replace. The light and housing was cleaned and put back together. Going back in the light fixture this time I was unsure what would be found. The metal components pried loose no problem. The plastic lens was brittle to say the least. Lets all say this together "Another trip to the parts store". Walking into West Marine the counter person is glad to see me. They know me by sight now. Strolling back to the isle I nearly faint. A new stern light matching my existing one will set me back $25 not including tax. Of course they have no replacement lenses. After a time I admit defeat. Rather than buy a new one I must head out to the wild beyond in search of!!!! Stopping off at Boats US (haven't been there in awhile) I find replacement lenses; opening the box I find it almost fits my existing cover cap. With my handy grinder I believe I can perform surgery to make it fit. Once home I can't wait to see if it works. I grind on the lens grind some more and quite a bit more. Now I am nervous. I will surely grind too much, resulting in a need to buy another one. Eventually I realize I must do radical surgery by cutting the plastic dome in half. After much trimming it is right. Using some 4200 adhesive the lense is glued inside the cover domed plate; using plenty of silicone sealer then installed back where it was before Return Bow LightI thought it might be a good idea to check on the combination running light mounted on the bow pulpit. This light has been a pain from day one. There is a stainless steel plate bolted to the top of the rail. The running light on the boat when I bought it was shot. I bought a replacement but couldn't get it to bolt up very securely. The end result wasn't very clean but worked sort of. I would have to take the light apart at least once a year to clean it and spray with corrosion resistant spray. The light has a mind of its own. Works most of the time, occasionally flashes on and off and sometimes won't work unless I take it apart and clean it. Part of the problem is the location. I am always banging the bow pulpit into something. Looking at the situation I thought of mounting individual sidelights alongside the hull. I had some concerns about this location and decided to seek the input of fellow South Coast owners. After posting to our message board one person mentioned the same issues I was concerned about. Mounting the sidelights along the hull is a bit too low and the boat police may not approve or other boaters may be unable to see my lights properly. Several other owners mentioned mounting running lights along the cabin sides. This is an interesting idea. I pondered this idea and may do it yet some time in the future. My only concern was the need to drill another hole in the boat. Stopping by West Marine an Attwood brand Zamak combination light is purchased. I chose this because it is lower profile and has a sturdy cover also 6' of tinned wire to wire the light into the electrical system. Climbing the ladder and inserting the allen wrench I carefully try to back out the setscrew holding the pulpit to the mounting pads. As I fully expected the setscrew wouldn't budge and strips. I really didn't want to implement plan "B". Grabbing my handy can full of wrenches and sockets I crawl into the v-berth to loosen the nuts holding the pad mounts for the pulpit. Most of the nuts break loose but naturally not all. Clamping a vice grip to one of the wayward nuts I climb back out and using a screwdriver attack the screw from the deck top. Fortunately the screws work free without too much bother. I have four nuts and screws needing special attention. Several trips back and fourth are needed. With the pulpit finally free I take it under the Oak tree for final fit of the light. The hole for the light wire needs enlarging, as it is not big enough for the wire I bought. Sacrificing one of my older drill bits eventually the wire hole is widened enough to thread the wire. Using some 3/4" plywood I cut a mounting pad for the light and drill the mounting holes and wire feed holes. Bolting everything in place I need a few adjustments to square things up just a bit. Eventually everything is worked out. At a later date I will use resin to seal the wood and then paint. When I pulled the bow pulpit the forward starboard side-mounting pad was loose and came off. This actually worked to my advantage. Gooping plenty of silicone around the pad base it is put in place and the new bolts threaded into the existing holes. The original bolts had been cut off and I didn't want to reuse them. Also the washers were small and I wanted oversize washers to act like a backing plate. Crawling in the v-berth the washers and nuts are added. Using a vice grip one nut is clamped. Crawling back out a screwdriver driver is used to tighten the nut and bolt. Back and fourth it goes clamping a nut and crawling out of the cabin and tightening from the deck the screw. With this one pad mounted I had a way to secure the rail to the deck and make sure the holes lined up correctly A bigger hole for the wire is drilled thru the existing hole underneath the rear starboard side mounting bolt holes. The wire has been previously threaded inside the rails. So all that is needed is threading the wire through the deck hole Starboard side first the rest of the bolts are installed. Due to the curve of the deck the port side mounting pads are about a 1/4' off the deck. Gooping the sealer directly to the deck one long bolt is placed through the pad and deck to align the holes. The remaining bolts are installed and tightened; the pulpit is back in place. The first coat of paint on the wood pad has dried tack free and I am impatient to make sure everything fits correctly. The SS mounting plate and the wood pad are bolted through the holes in the rail. The light is quickly screwed in as well. Stripping the wires I am just going the twist and tape them for now. Back in the v-berth the lead wire is crimped on the existing wire running from my switch box. Flipping the switch everything works just fine. I will need to take the light off and finish painting the wood pad then complete the connection. Return DisclaimerThe information on this page is not intended as a "definitive" guide to sailing . Electrical DisclaimerI am not a qualified electrician and make no representation to being such.
|
Return formated for 800 x 600 and Cascading Style Sheets |