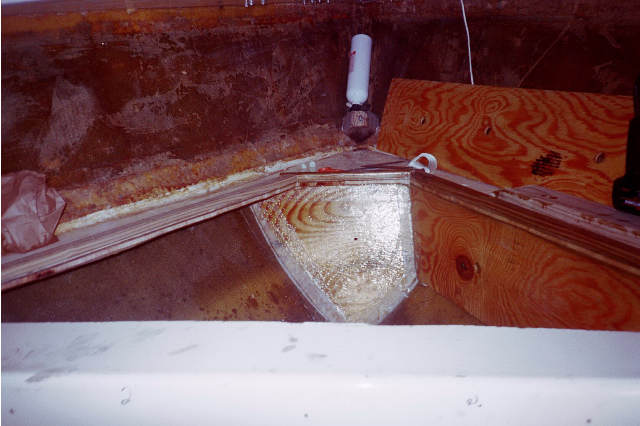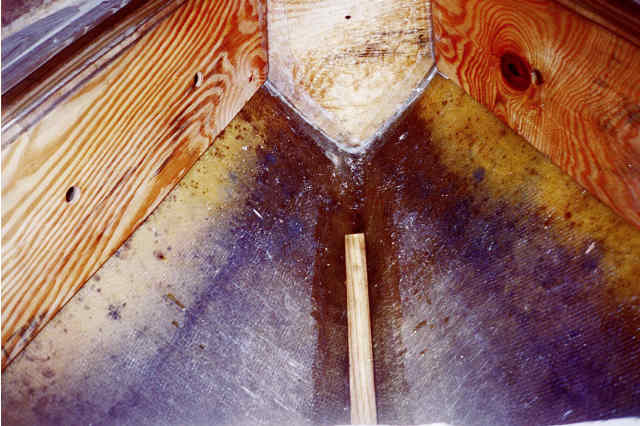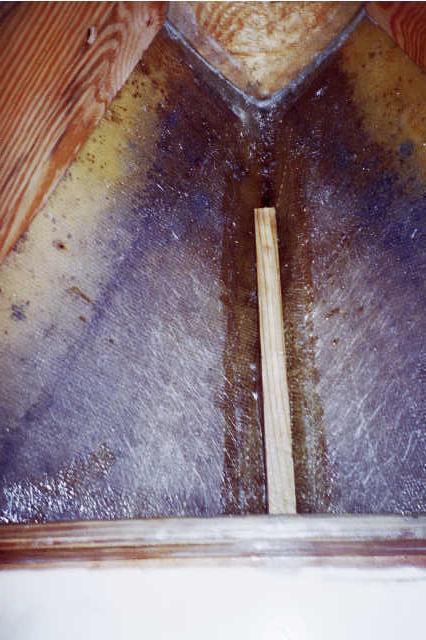
Copy Write 2/1/2001 © Updated 12/19/2005 V-Berth Battery Rack Disclaimer E- Mail V-BerthI couldn't resist the temptation to cut into the V-berth to increase storage space. Originally there was a factory storage box. The location was inconvenient to use for anything other than long-term storage. This fiberglass box frame used in another location would be useful so this box frame will be salvaged. Rather than cut the entire v-berth out I chose to remove the center section. The cut line was laid out 2' from the bow and six inches in from the sides. I should have cut 8" from the sides as the skill saw was too wide to fit along the cut line and the sides of the boat. I eventually got everything rough cut anyway. Will go back later with a jigsaw and grinder to clean things up. Fiberglass and balsa dust goes everywhere. I bought a box fan to keep air moving during the summer heat. It does OK at getting the light dust out of the cabin two fans would be better. The heavier stuff is everywhere. It will be a job to get it cleaned up. If you don't already have a skill saw I suggest you consider one with a dust bag. Make sure you wear long sleeve shirt, long pants, socks, and mask the bits of fiberglass get everywhere. A jig saw is used to trim up the edges of the V-berth I discover fiberglass and gel coat is hard on the saw blades because they don't last long. I went through 4 blades just doing some trim work. The next step is to try to clean some of the mess made cutting out the v-berth section. Fiberglass and balsa dust is everywhere, and clogs the vacuum cleaner bags quickly. I have enough vacuum cleaner bags to at least get the worst of the dust. After cutting the hole I find the V-berth has no foam flotation just trapped air. There is what appears to be a bulkhead but it is not attached to the sides of the boat and appears to support to gelcoat side of the V-berth that faces you when in the cabin. A panel is to be placed at the forward edge of the cutout. Using some old particleboard and lots of trimming eventually a template is cut. Using the template the final piece is cut out of plywood. The first batch of M-Word 20001 polyester fiberglass resin is mixed. The area of the hull where the panel goes receives a coat of resin and the plywood is coated both sides and set out to dry. Once kicked off the plywood panel is fitted in place with tape placed along the edges to bond the bulkhead to the boat hull then wetted down. After everything is tacky another layer of cloth and resin is applied.
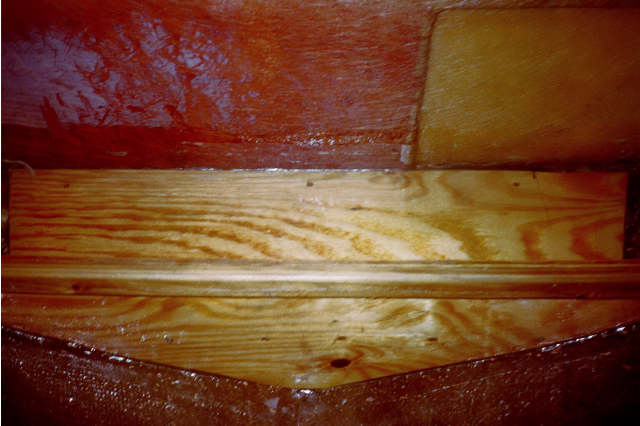
Panels are to be run along the sides of the hull from the v-berth cut out down along the curve of the hull to where the boot stripe is. The boot stripe is gel coat and easily visible from inside the boat. These panels will support what is left of the original v-berth. These panels are to run from the bulkhead I installed back along the hull to the original v-berth bulkhead. They are 10" wide and 50" long. The first one is trimmed and trimmed to make the ends match up. The other side is basically the same so once the first one is cut it makes a template for the other. After everything is hung the panels are sealed with polyester resin. Mounting these panels was tricky at first until I screwed in a short 2x2 to the forward bulkhead. The 2X2 was installed 3/8th" back from where the panel was to fit The starboard panel was screwed in place at the forward end and braced in place at the stern end. Fiberglass tape was run from the top of the 2x2 trim piece down along the edge of the v-berth cut out and down to the panel. 2" wide tape is more than enough to cover everything. Treated 2"X2"s are cut and screwed on the top of the original v-berth edges. These trim pieces will protect the edges where the v-berth was cut; also they will brace and support it.
It is time to work on the sloe for the remaining space in the v-berth. A treated 2x4 is cut 30" long for a floor support stringer. The stringer will be glassed to the bottom of the v-berth from the front of the battery box toward the bow. The back end of the 2x4 is angled ˝" to allow for the angle of the hull. 3/8ths" would have given a tighter fit but ˝ is good enough. Next the angle for the hull rise needs to be measured. I took a straight piece of wood and placed it across the v-berth opening, measured down to the hull. Then slid the wood forward 2' and measured again. The difference between the two was 1 ˝ "giving me the angle I need to rip the 2x4. From the angled end of the 2x4 forward 2' I laid out my cut lines and scribed the line forward to the end of the 2x4. Cutting this was tricky because I have limited wood working tools. Clamping the big end of the 2x4 to a large piece of scrap particleboard the skill saw is used to cut from the little end toward the big end as far as the saw will go before bumping into the clamp.
When I am good I am very good but when I am bad, some things are best left unsaid. Some scrap plywood is used to cut the sole decking. The decision is made to seal this panel with resin and let it lie loose. Any water will drain down below this sole. Battery RackStoring the house batteries has always been a pain. There is no perfect place to build a battery rack. The decision was made to build a battery rack in the v-berth. Two batteries mounted low forward will go a long way keeping weight off the stern and balancing the boat. I spent some time hacking a few 2"X2"s into the proper shape to fit the curves of the hull for braces. Then those measurements where transferred to a treated 2 X 4. After sealing everything with polyester resin a trip to the store was in order for two battery boxes. I want to set up the battery rack for two batteries for cruising but only plan to have one aboard for daily use. Another battery brace is a 2X4 cut 36" long laid flat athwart ships. Measuring down from the flat top of the two by four Ľ" down from each end. Along the side a line 3" back from the end was scribed. Using a pencil an angled line is laid out from the Ľ" mark to the 3" mark beveling the edges to fit the angle of the hull then cut. This brace is bonded directly to the side of the original v-berth bulkhead. A scrap piece of wood is hacked into a template to match the curve of the hull on one side. Once completed, this template is placed upon some plywood traced then flipped to the other side. Once cut out the panel is cut in half. In the v-berth the two pieces are held together long enough to trace the corners of one piece of wood to the other making a template with the proper angles to match both the curve & the angle of hull. The two pieces they are laid out on another piece of plywood and the two halves fitted together based upon the scribed lines.
Once cut out I have a panel that will fit in the v-berth to make the forward brace for the battery holders and allow me to separate the batteries from other storage in the v-berth. Some final trimming and the fit is as good as I know how to make it. Some stainless steel screws are used to attach a 2" X 2" parallel to length of the plywood bulkhead I made. This 2"X2" will support the batteries. Also I attached a 1" X 2" along the top part of the bulkhead. The 1X2 is mostly there to protect the edge of the plywood from getting beat up. Also between the 2X2 battery brace and the 1X2, the bulkhead has stiffened up quite a bit so it will hopefully hold up to the pounding of sailing. The bulkhead is glassed in and the bottom board of the battery box is glassed as well. For all practical purposes the battery box is completed. Cut out and screwed in the plywood bottom then glassed every thing in. A few more strips of tape along the ends to make sure everything gets sealed. The tie downs for the plastic battery boxes are installation later. |
DisclaimerThe information on this page is not intended as a "definitive" guide to sailing . formated for 800 x 600 and Cascading Style Sheets |