
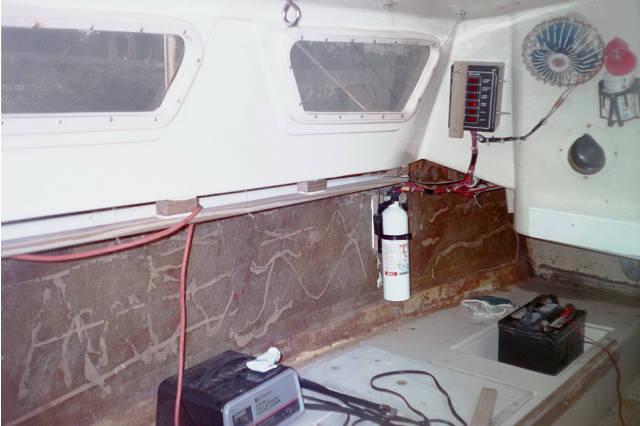
Copy Write 08/18/2000 © Updated 12/19/2005 Cabin Rails Pop Top Companionway Disclaimer E- Mail Cabin RailsI don't know about bigger boats but trying to find a good place to store everything is a pain. The smaller stuff is OK, the bigger stuff is a bit different I always seem to be moving this to get to that. Whisker poles are a good example. I would like to mount a 2"X2" wooden bar along the sides of the boat inside the cabin once mounted I can use this bar as an attachment point. Another issue is mounting a PVC pipe to run wiring. 4200 adhesive is used to glue 5 blocks 3"X2"X2"to the area where the cabin meets with the hull. At first glance it looks simple to set the 2"X2"X6' rail. Put some 4200 on the blocks jack the rail into place and let dry. Fortunately I am not fooled. I try a dry run, some of the blocks seat solid others have a gap. I only have two jacks to put pressure on the rail. By adjusting the pressure point of the stern jack I am able to set all but the forward block. The gap of the forward block is enough that I can glue and set later. Spreading the 4200 adhesive around the rail is put on the forward jack and crank some pressure on it. When setting the back jack and adjusting the rail something goes wrong and everything comes tumbling down. Cleaning up the mess and reapplying sticky stuff I go at it again. This time I manage to hang on to everything long enough to stabilize the rail. 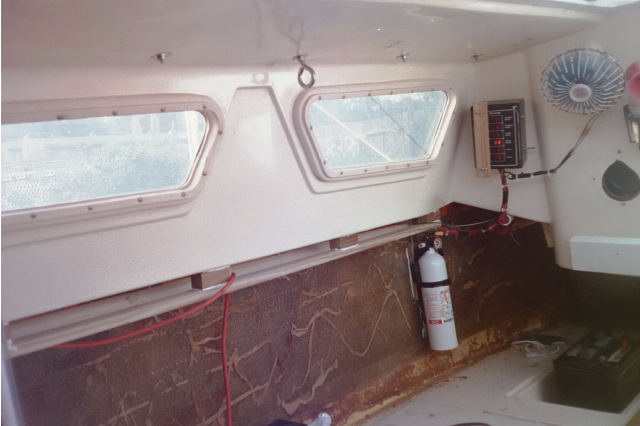
Pop TopI have known for sometime, water was getting into the cabin from somewhere off the cabin top. Not bad, but just enough to leave puddles. I didn't realize how much water was seeping through until a summer shower drifted through. While in the back yard it would be a good idea to pull the entire cabin top hardware and re-bed. Rather than pull everything I decide to pull the entire cabin top. Taking it inside where I can work in air-conditioned comfort. As usual there are a few nuts and bolts needing the special attention of a grinder. Once back together and mounted on the boat the other cabin top hardware is next. Starboard side everything comes off cleaned squirted with silicone sealer and remounted UNTIL the teak handrail. Hurricane Danny visited several years ago; the port side damage was repaired including installing a new handrail. As is usually the case all nuts to the handrail came off except the last. I look at it and realize it isn't coming off. Trying different ideas, none working eventually something goes wrong and the handrail ends up broken. The bolt still won't work loose. Did I ever mention the grinder I bought when I worked on the keel? Sure is a handy thing to have around. Port side everything comes off and back on with no problems. Mixing a small cup of resin I work on filling the hole left by the previous repair and my efforts at removing the bolt. There have always been two items on my boat I have felt most uncomfortable with the "lifelines" and the teak handrails along the cabin top. To me the stanchions supporting the lifelines seem a bit flimsy. I doubt they would hold up well should I put my weight on them. The other concern has been the teak handrails. They look good but when I put any weight on them they give a bit. Often I wonder about those handrails holding up if they where needed? It seems I now have an incentive to build handrails stout enough to do the job. Using treated 2"X2"s one is cut to match the length of the teak handrail. With the old rail as a template the bolt holes are marked and drilled for 3/8ths bolt the existing holes are 1/4. Placing bolts through the holes I find I didn't drill the holes quite to match. Scrap one piece of wood. This time I place the wood in position on the cabin top mark and drill the first hole and down the line. Upon finishing all the holes I find the curve of the cabin top makes it difficult to bend the 2"X2". Rather than one long handrail I opt for one short and one not so short handrail to compensate for the curve. This approach provides a much better fit. Using the same size wood I cut 2" spacer blocks to fit between the rail and cabin top. With a C clamp and 4200 adhesive the spacer blocks are glued in position. As each rail sets enough to work with I drill the hole through the spacer block. Mounting the first short rail, an idea pops into mind. Storage on a boat is always at a premium, a 22' boat even more so. A quick trip to the store (yes this time I am victorious) I return with four 4" eyebolts. The eyebolts are a bit bigger than the bolts I planned on using to mount the rails, the mounting holes need adjustments. Threading the eyebolt up from the inside of the cabin through the rail mounts and out the other side I find my judgment is correct. The bolts don't clear the top of the rail. The holes must be countersunk to allow for the nut. Counter sinking the bolt holes is perfect; I didn't want to grind the bolts off. Now I have places in the cabin to hang things as needed. The above sounds simple but don't be fooled. I have one C clamp so the process of attaching spacer blocks takes a while. Once the 4200 sets I move on to the next block. As each rail is completed I mount it as the others are curing. Also I don't have the carpentry skills to measure once drill and set. Time is spent putting it together making adjustments and installing for final fit. Once bolted to the cabin top I test the fit. Yes I am happy the handrail is significantly stronger. I will need to seal the handrails and will paint them another day. The handrails I built need sealing with polyester resin. Some old wire cloths hangers are threaded through the mounting holes of the handrails. The wire supports the handrails as they are coated with resin. After the resin has cured the handrails will be painted then mounted back upon the boat. CompanionwayThe more you do, the more there is to do. The threshold of the companionway has taken a beating over the years. A previous owner slapped up some fiberglass tape as a quick fix. Even the fix needs fixing. It may be overkill but, I decide to mount a 2"X4" on the cabin side. The Eclipse has the keel pendant winch under the companionway; some of the SC 22's have it mounted in the cockpit. Not sure which I like better. The 2'X4" needs some surgery to allow the winch handle to move free. Marking everything I move back under the oak tree to play with one of my most valued boating tools. Have I ever mentioned the grinder I bought? After several fittings I finally have a shape ground into the 2"X4" to allow for the winch handle. The wood bar is sealed with polyester resin and left to cure. After the resin cures the wood bar is clamped in place, the mounting holes drilled and the bar mounted in place. |
DisclaimerThe information on this page is not intended as a "definitive" guide to sailing . formated for 800 x 600 and Cascading Style Sheets |